0

The Perfect Tea

IMG_0813IMG_0788IMG_0796

 Buongiorno bakers, I think I should start by saying Ciao as right now I am in ITALIA!!! & it’s not just a holiday i’m on either. I’m here to stay for 5 months on an exchange programme which only means one thing…… a lot of italian food to come! (you can also follow my journey at casaalmare.me 😉 ) So before I headed off, as a final goodbye to my family and family friends, we hosted at tea party at our house. I was prepping all week to ensure that everything was just perfect and it couldn’t have gone any better. I decided to bake 5 items for the table which were: apple, cinnamon muffins, a banana coconut loaf, melting moments ;), hedgehog slice and the star of the show- my rhubarb, walnut, white chocolate crumble cake (deep breath). Alongside the bakes on the table was a vibrant seasonal fruit platter, a platter of vegetables, dips, salmon, bagels and other little condiments. Oh and I almost forgot there was a giant tub of Neapolitan ice-cream (with cones) which the kids absolutely lapped up! 

IMG_0808

As I decided to bake soooo much I thought it would be too long to put all the recipes and instructions in this one post. I will post the recipes on the blog all in good time but today I will just be sharing the pictures and memories, as well as some tips on what I believe makes up the perfect afternoon tea 🙂

It took a lot of time and thought on designing the menu for the afternoon and even though it was really nothing fancy I enjoyed putting the effort in and seeing great results.

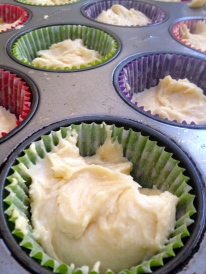
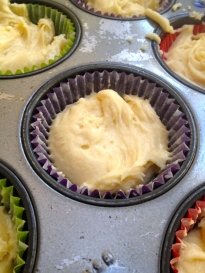
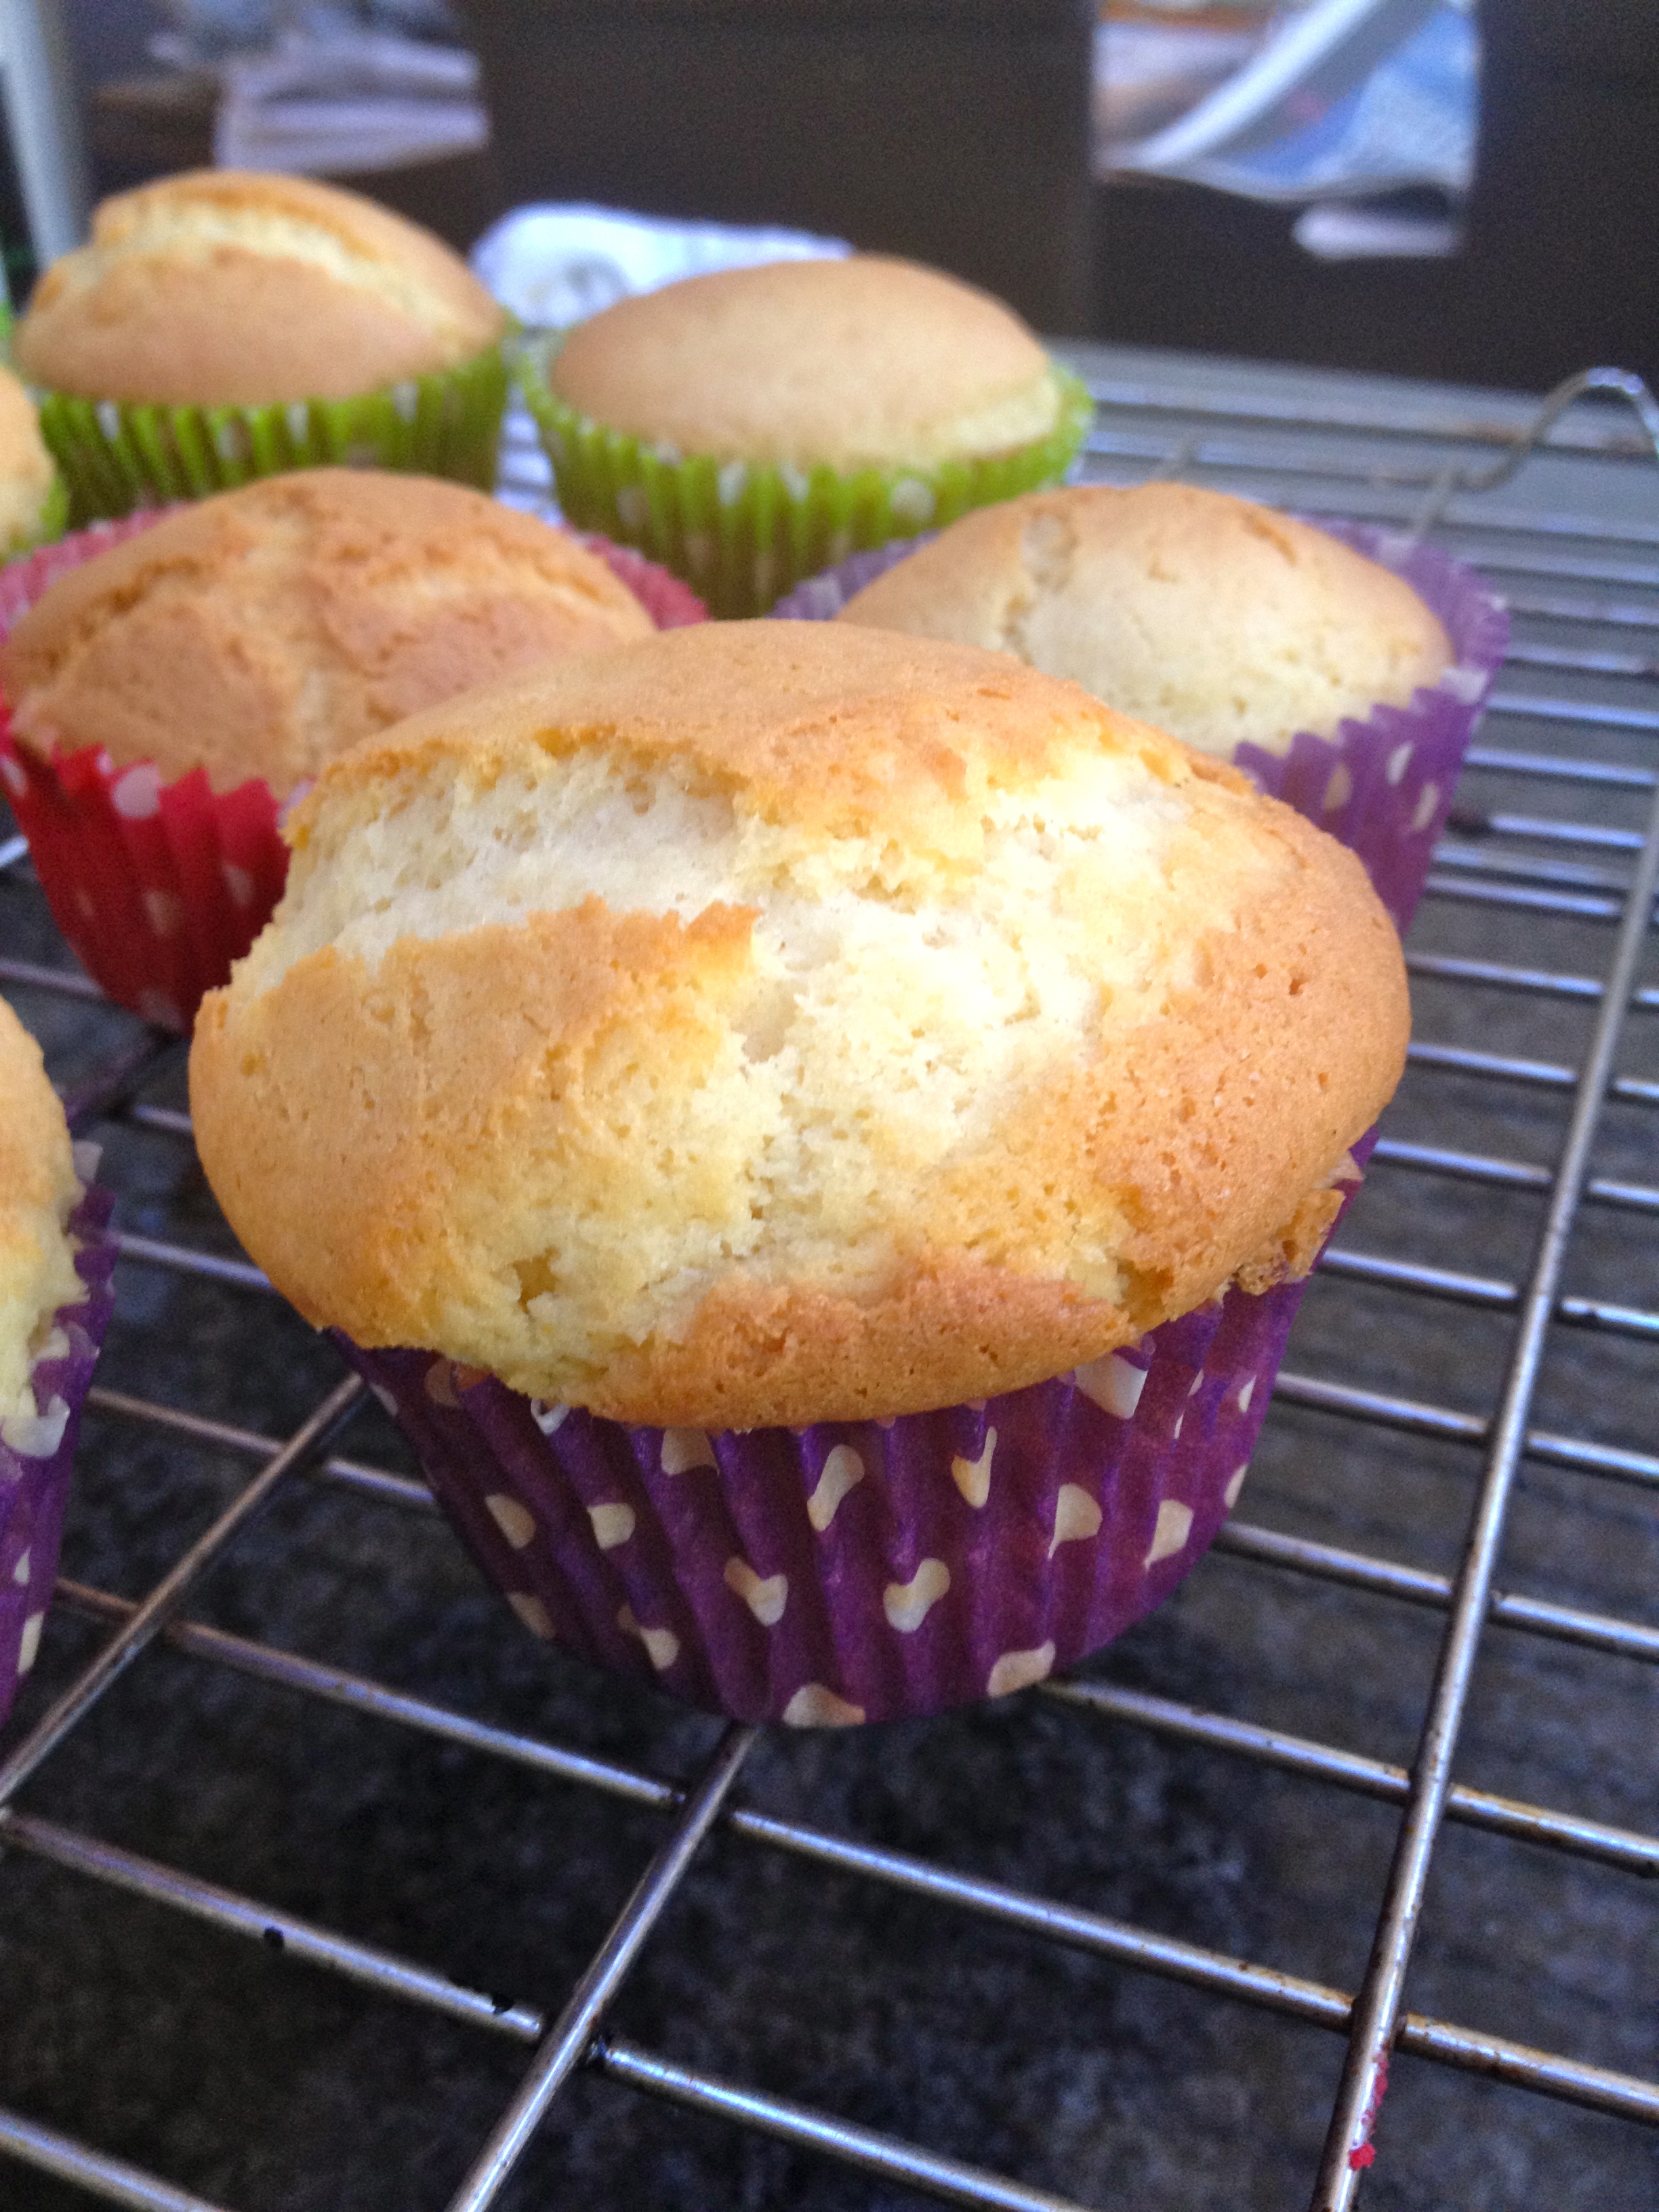
I just knew I would be making my very trusted muffin recipe and I thought the combination of apple and cinnamon would be exciting to have. They looked amazing all stacked up and dressed in there oh so cute muffin cases!

unnamed-1

Now moving on to the banana, coconut loaf- another interesting combination but it’s rich flavour and moist inside was heavenly. I decorated the loaf with raisins and banana’s and if I do say so myself: it looked sensational!

unnamed

 So moving on to the biscuits… melting moments of course. This time I cut them into abstract shapes decorated them playfully for a touch of silliness. 

IMG_0815

Hedgehog slice was such a hit with the chocolate fanatics. They were fudgey and delicious and looked very inviting sprinkled with coconut and scattered on top of each other.

photo

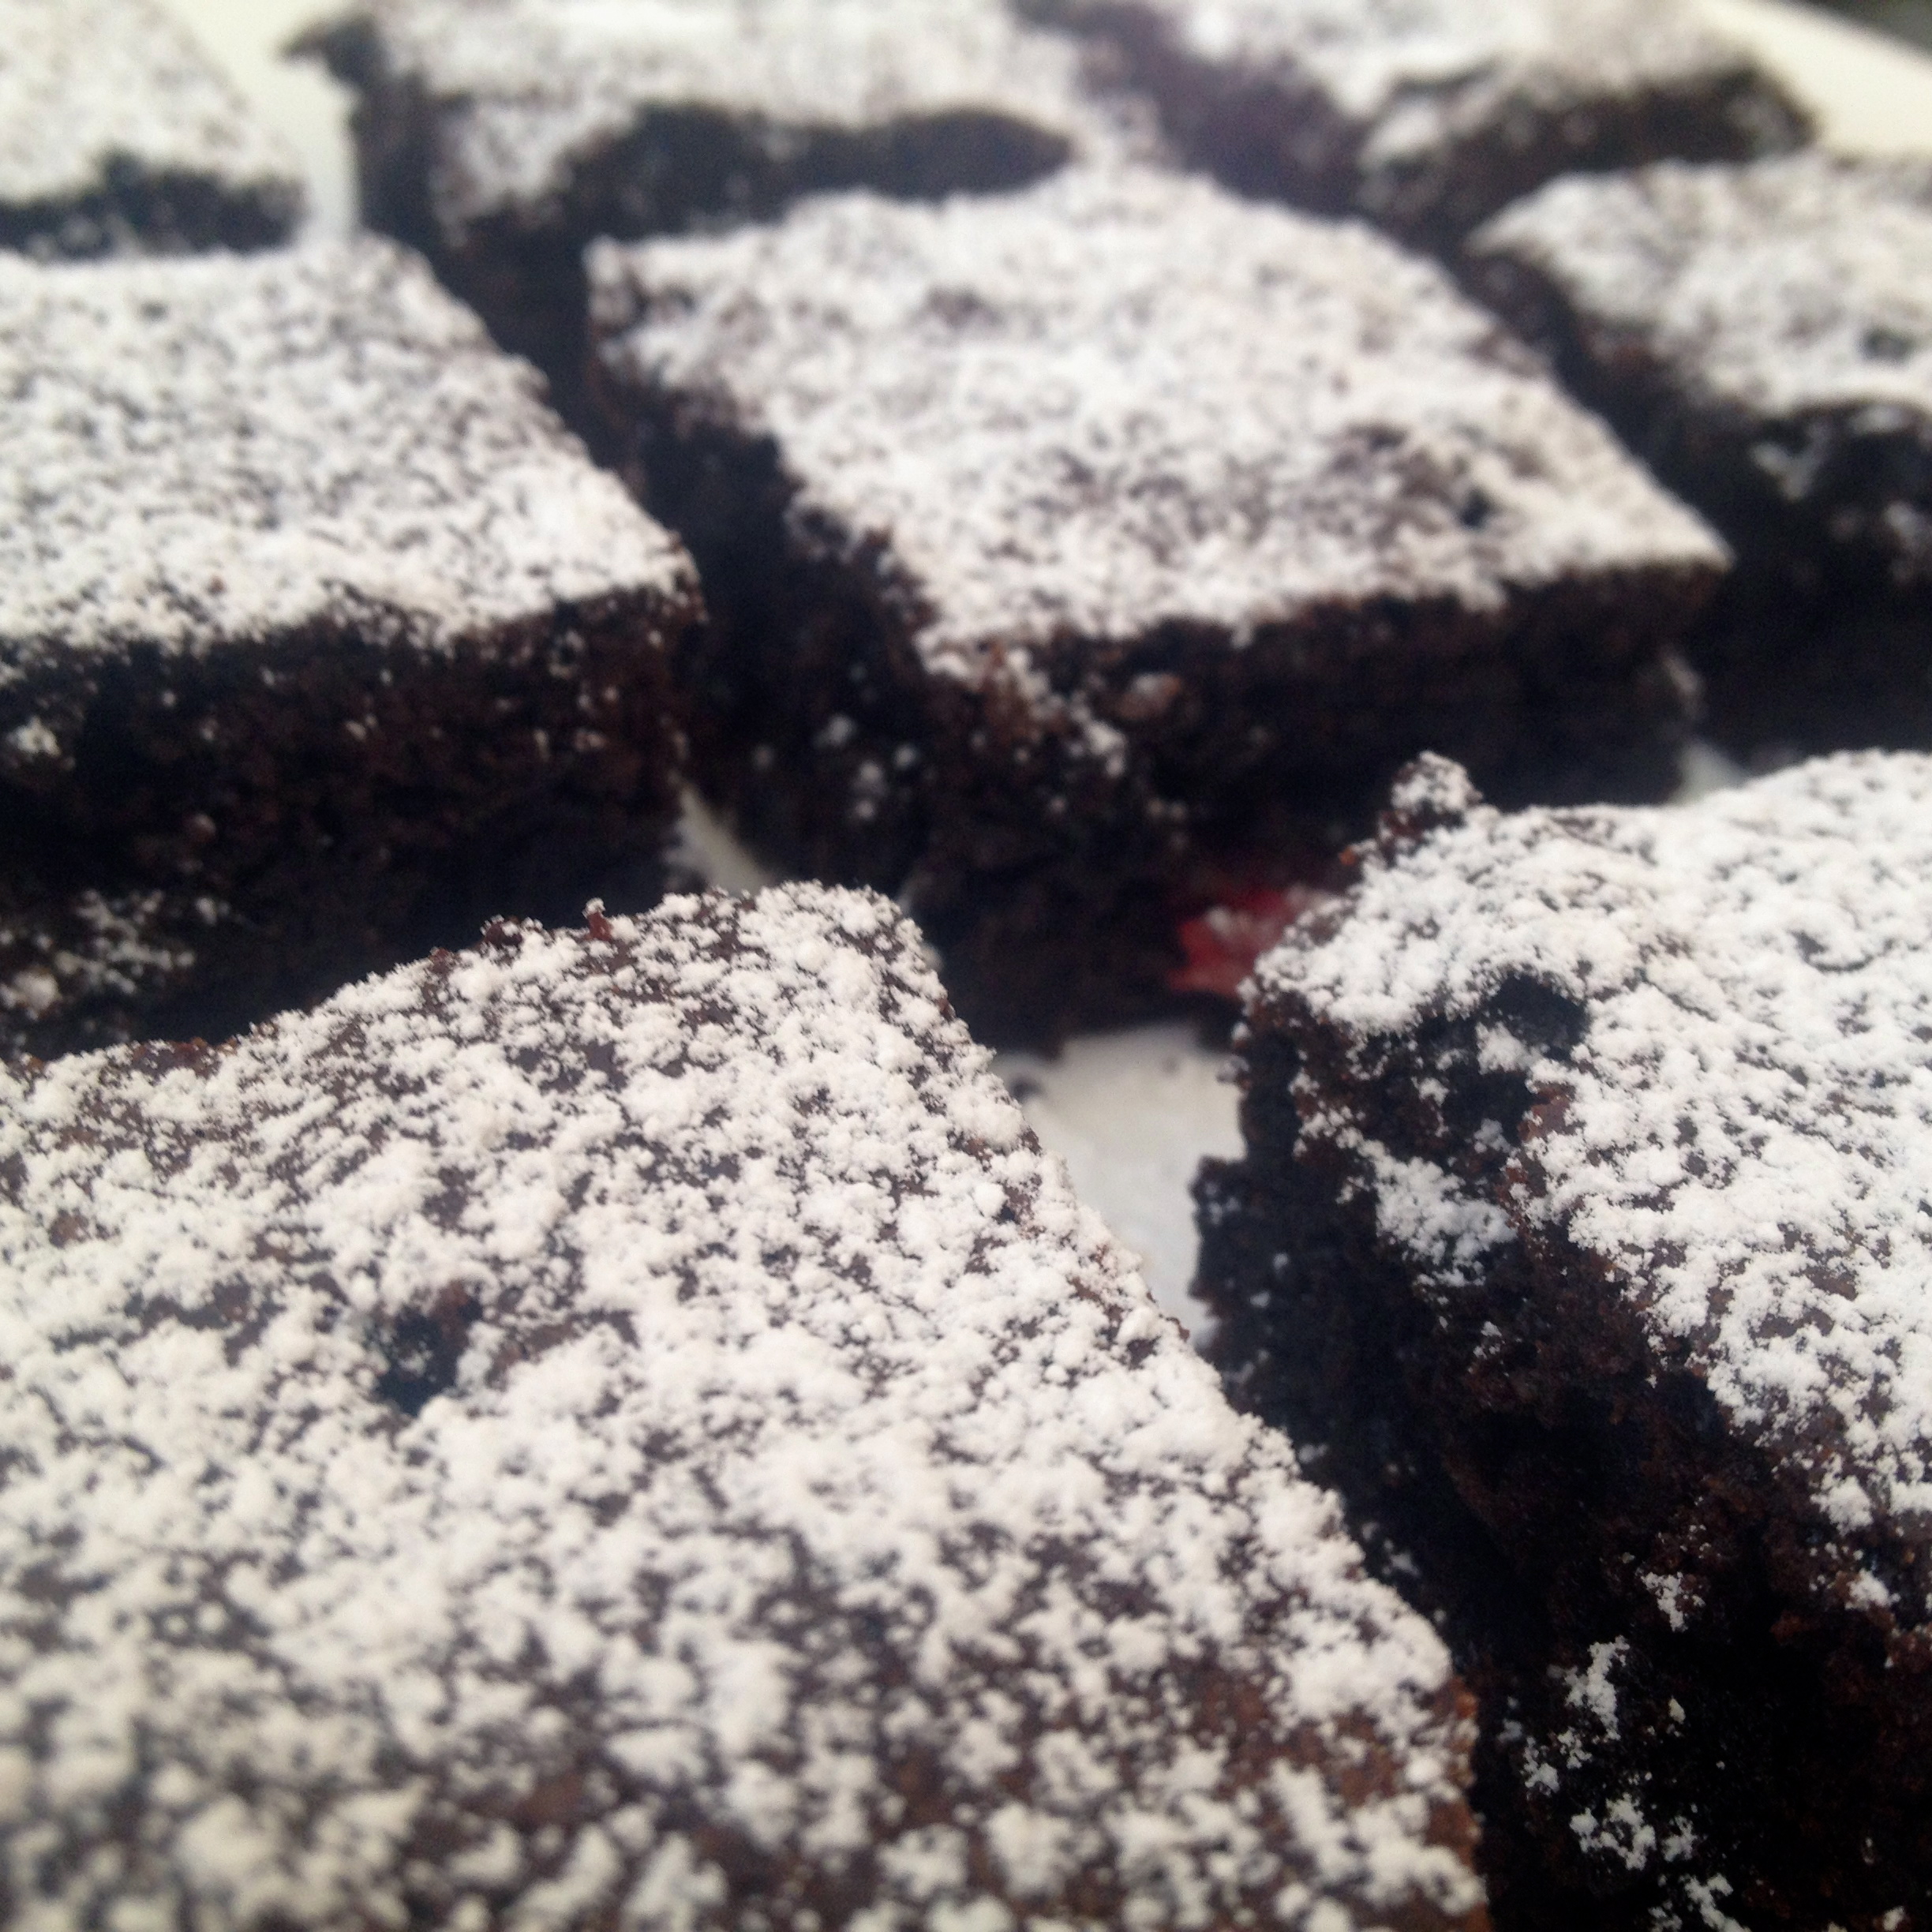
For the centre piece and my personal favourite I baked a (big breath) white chocolate, walnut, rhubarb, crumble cake! It was so yummmyyy I could eat it all day every day and it was definitely the guests favourite of the afternoon.

unnamed-2

My top 3 tips for a successful tea party would be:

  1. Play around with interesting, tasty flavour combinations to keep the experience exciting and not just the boring, old traditional treats.
  2. Try and make a variety of sweets, so that all your guests will be satisfied whether they are chocoholics, nutty for nuts, fruit fanatics, cake eaters, biscuit munchers, loaf lovers, silly about slice or mad about muffins!
  3. Finally make everything as colourful and vivid as possible. Remember we eat with our eyes so make it as ravenous as you possibly can.Go wild with your decorations and have fun!

So there you have it, the recipe to my perfect tea. I must say the food was so spectacular however just being surrounded by my loved ones is what made the day so special. I hope this was helpful for any of you out there planning a relaxed and delicious party in the future.

IMG_0786

Love, Suz 🙂 ❤

0

Chewy Coconut Meringue with Homemade Lemon Curd

IMG_8051

I’d like to begin by apologising for not posting for so long! I have been busy getting ready for some exciting surprises which I will let you in about soon. Hopefully I can make it up to you with these little delights. What are they you ask? They’re sweet, chewy, crunchy, tangy and soft- they are my coconut meringue bites with a lemon curd surprise! So so simple to bake and such a cute little treat to tickle your taste buds.

Begin by lining two baking trays and preheating the oven to 120 degrees. It’s really important to measure out your ingredients precisely for the perfect result. Once your confident to begin start whisking up the egg whites in a large bowl. At this stage you can add a pinch of salt or cream of tartar to stabilise the egg before the sugar goes in.

Once your mixture has reached soft peaks, add the sugar gradually between whisks. When all the sugar has been added continue to whisk for a further 2-3 minutes or until the mix is thick and glossy. Also make sure all the sugar is dissolved. I use the age old trick of rubbing a touch of meringue between my thumb and my index forefinger. IMG_7996

IMG_7999When you’re happy with the constancy carefully fold in the shredded coconut for lovely flavour and the pink food colouring for aesthetics.  

 Now you can pipe or spoon out the meringues onto you’re prepared baking trays. On one baking tray pipe large circles and on the other do little swirls which will be the hats on the lemon curd treat. Pop them in the oven, turning the heat down to 90 degrees celsius for 1.5 hours then turn the heat off and let them sit for a further 2 hours… I know it seems long but it’s worth it for the best meringues you’ll eat. When they come out of the oven they should be crisp and sound hollow when tapped on the base. They will be light, crisp and chewy on the inside mmmmm

IMG_8029

Now to get creative… simply pull out you’re homemade lemon curd (or store bought if you must) and put a teaspoon of lemon curd on top of the larger (base) meringue and top it off with you’re little swirly meringue hats. So cute, so impressive and so worth it!

Ingredients (makes 12 large):

  • 4 Egg Whites (ROOM TEMPERATURE!)
  • Pinch of salt or cream of tartar
  • 1 cup of caster sugar
  • Dessicated coconut
  • 12 tsp lemon curd

IMG_8046

There you go. Delish (licks lips)! 

Hope you loved today’s recipe 

Love, Suz ❤ 

0

Naughty Nutella Cupcakes

IMG_7817

I was wondering what to bake these holidays, so I thought something chocolatey and indulgeIMG_7797
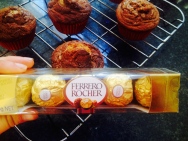
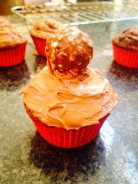
nt would do the job and my sister asked me to bake her friend a gift for her birthday, so I thought these cupcakes were the perfect treat to whip up. With the combination of Nutella and a decadent Ferrero Roche to top it all off, how could it go wrong?

Begin by preheating your oven to 180 degrees celsius and line a muffin tray with 12 muffin cases. Next get on to creaming the butter and the sugar until nice and smooth. Add the eggs, one by one, mixing briefly after each addition.Then gradually beat in the flour, cinnamon,  baking powder and the milk.

IMG_7757IMG_7760IMG_7762

Now evenly distribute the butter into the muffin cases. And here’s for the fun part: Heat the Nutella for about 20 seconds in the microwave. Then add a teaspoon of Nutella into each muffin case and with a skewer swirl the mixture. This will not only taste incredible but it will give the cupcakes a lovely marbling.IMG_7768
IMG_7772IMG_7777

Place the cupcakes in the oven for 20-25 minutes and in the meantime start on the icing which involves yes you’ve guessed it… NUTELLA!

Melt some chocolate in the microwave or over the stove and then transfer into a mixing bowl. Once the chocolate has cooled a little, add the double cream, butter and vanilla extract and beat well. 

IMG_7779

IMG_7783Then just beat in the nutella until the icing is smooth creamy and ready to devour. Place the icing in the fridge until the cupcakes come out of the oven and have cooled for a good 10 minutes.

Now all that’s left to do is ice the cupcakes.. you can do this with a piping bag or for the rustic look (which I’ve gone for) just spread with a knife. Finally add a Ferrero Roche for that finishing touch and I guarantee you won’t be able to resist!


Here’s what you need for 12:

Cupcake:

  • 175g butter.IMG_7761
  • 175g caster sugar.
  • 3 eggs.
  • 200g s-r flour.
  • 1 tsp baking powder.
  • 2 tsp ground cinnamon. 
  • 4 tbsp milk.
  • 12 tsp Nutella 😛

Icing:

  • 300g milk chocolate.IMG_7795
  • 60 ml double cream.
  • 4 tbsp butter.
  • 1/2 tsp vanilla extract.
  • 250g Nutella 😛

& Don’t forget 12 Ferrero Roche to decorate.


 And that’s the recipe for today. They are so delicious and so naughty that you just can’t help yourself. It’s holidays and you are free, so eat up and enjoy yourselves!

IMG_7808IMG_7799

Love Susie ❤

1

Heavenly White choc, Thyme and lemon Truffles

IMG_7698It feels like forever since I’ve last blogged about a bake and Sandy and I apologise for taking so long, we’ve been very busy lately!  However, if there is one recipe to redeem ourselves I can confidently say this is the one 🙂 These beautiful balls of white chocolate heaven, married together with lemon and thyme, are surely melt in your mouth magical. They are rich, creamy and the perfect little treat to end off a long day. So enjoy the recipe- it’s easier than it seems and there’s absolutely no oven involved.

IMG_7684

IMG_7604Let’s begin! In a small saucepan heat up the heavy cream, lemon zest and thyme sprigs with aIMG_7612 medium flame, until the combination comes to a simmer. Then remove from the heat and place on a lid allowing the mixture to come to room temperature which should take around 20 minutes.

Whilst you wait, you can begin to chop up the white chocolate and combine that with the butter and salt in a medium heatproof bowl.

IMG_7617
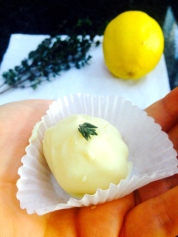
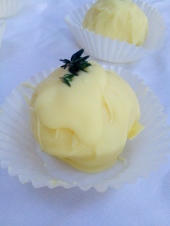
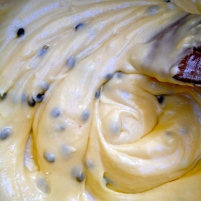
Once the cream has cooled place it back on the stove, on medium heat, until, again, it reaches a simmer. Then remove the mixture and strain the cream, into the white choc, with a fine-meshed strainer, pressing down on the thyme sprigs and lemon zest to extract as much flavour as possible.

Now set the chocolate mixture over a pot of almost simmering water and constantly stir until just over half of the chocolate has melted. Then remove from the double boiler and continue stirring until the whole mixture has melted smoothly. Then just stir in the lemon juice until it’s well incorporated.

Place the mixture in the fridge for a good 4 hours and then it’s time to wait. 

Whilst I was waiting Sandy and one of our friends came over and we walked to a really cool gelato store named Stix. We were quite crazy because it was freezing cold but it didn’t take away from the incredible taste and atmosphere. 

IMG_7636IMG_7643

It was such a cool place, we got to pick a flavour and then decorate our ice-creams with elaborate toppings 🙂 So obviously we went crazy!

IMG_7641

Then we headed back to mine in time to pull out the truffle mix at the right consistency to start rolling into balls. To give the truffles a great finish melt some white chocolate and dip the balls in it. Lastly place a few leaves of the thyme on top of the truffle and there you have it. Perfection in the form of a little white sweet. 

IMG_7689

Okay so here’s what you need to make a batch of 20 or 25 smaller truffles:

  • 90ml heavy cream.
  • 200g white chocolate (for the truffle mixture)
  • 200g white chocolate (for the glaze)
  • Around 10 thyme sprigs.
  • A pinch of salt.
  • 40g butter.
  • Zest of 2 large lemons.
  • 2 tbsps of lemon juice.

And that’s that. These are amazing treats that you can store in your fridge for up to a week and freeze for months! So I hope you liked todays recipe and please go ahead and give it try- you won’t regret it!

IMG_7700

IMG_7667

IMG_7671


Love, Susie and Sandy xOxO

0

Magical Macarons

I have always dreamt of baking these delights but it seemed too tricky, too out of reach. I researched a lot to find the perfect recipe and…. wha-la, these ones are a beauty. In geography we had to create a stall for a country which Australia give’s aid to, so obviously susie and I were really excited because we could bake things for the stall 🙂 We chose the beautiful country of Vanuatu.IMG_7002

^heres our stall, do you like? We made magical macaroons, mini cupcakes and mocktails, The 3 M’s 🙂 Everyone lapped it up and we made $234 dollars 🙂 which all went to children in Vanuatu. We even won the prize for the most creative store so we were super pleased 😀

Susie and I went shopping on Sunday and we baked all day long. Such fun! My favourite type of day 🙂 We kept getting dirty looks from people all around us because our trolly was so unhealthy and so choc-a-block!

IMG_6821

Susie and I have a created a special sunday tradition of bear foot baking 🙂 love it!

IMG_6822

The main and the most exciting ingredient is the almond meal. it just gives the mac’s such an amazing texture.

First you have to mix the icing sugar and almond meal. Sifting for a soft texture.

IMG_6824

Then in a separate bowl whisk the egg whites until thick and glossy and add the sugar one table spoon at a time 🙂

IMG_6847

Then fold the dry mix carefully into the meringue with a spatula. Now its time to add in the food colouring 🙂

IMG_6862

IMG_6832

Finally pipe the macaroons onto a baking tray and let them set for 1 hour! Don’t forget to keep an eye on them! If they don’t set for the full hour they will flop! Trust me I have first hand knowledge of the potential failures 😉

Preheat the oven to 150 degrees celcius and bake for around 10 minutes

When the macarons are done baking let cool completely and fill with buttercream or any other desired filling! Mix all butter cream ingredients in a mixmaster and wha la! The macarons are done.

IMG_6990

Ingredients:

Macaroons

  • 100 grams almond flour/meal
  • 100-110 grams egg whites (about 3 egg whites)
  • 200 grams icing sugar
  • 4-5 tablespoons sugar

Butter cream filling

  • 250g icing sugar, sifted
  • 80g unsalted butter, at room temperature
  • 25ml whole milk
  • A couple of drops of vanilla extract

IMG_6947

We also made cupcakes and dressed up our bakes with the flavour and colours of tropical, French Island Vanuatu 🙂 enjoy your week!

IMG_6983

Lots of love and kisses

Sandy

x

0

Choc-Chip Banana Mini Muffins

IMG_7139

 I’ve had a lot of time on me lately so I wanted to concoct a delicious healthy breakfast and snacking muffin. I threw together some nutritious and delicious ingredients to come up with these mini delights! They are so yummy that I’ve made a batch each day this week and they’ve been all gobbled down by the fam. I’ve also been doubling the batter as a pancake and it’s just as delish as these muffs!

IMG_7091

To start grease a mini muffin tray, then set aside. Don’t forget to preheat the oven to 190 degree. Then its time to make a start on the dry ingredients. Mix together the almond meal, oat bran, baking powder and cinnamon. Then make a well in the middle of the bowl and set aside.

IMG_7095

Now for the wet ingredients: Melt the almond butter and the honey in the microwave for 20 seconds. Mash half a banana and combine with a lightly beaten egg and the vanilla essence. Also mix the cup of milk with the bicarb soda. Then pour the wet ingredients into the well of the dry ingredients. Mix well.

IMG_7103IMG_7104

Finally add the chocolate chips and stir together.

IMG_7108IMG_7113

Now pour a table spoon of the mixture into each muffin mould and then slice the other half of the banana, placing one slice on top of each muffin. Oh and feel free to use any left over mixture for pancakes!

IMG_7117IMG_7118IMG_7123

Finally place the muffins in the oven for 20 minutes or until baked well.

Ingredients (makes 12 mini muffins):

  • 1 cup Almond meal
  • 3/4 cup Oat bran
  • 1 tsp Baking powder
  • 1 tsp ground cinnamon
  • 1/2 tsp Bicarb soda
  • 1 cup almond milk (or any milk you prefer)
  • 1/4 cup honey
  • 1.5 tbsps Almond butter.
  • 1 large banana
  • 1 tsp vanilla essence
  • 1/2 cup Chocolate chips
  • 1 egg

And there you go! Healthy, delicious, nutritious and guaranteed to disappear by the end of the day 😛

IMG_7127

IMG_7143IMG_7148

Enjoy friends 🙂

Love, Susie ❤

0

Marvellous Marshmallow-Cherry Fudge Brownies

IMG_6795

 Big ooey, gooey, sticky, licky, marshmellowy, cherry, choc, fudge Brownies (Deep breath)! Any bet you’re salivating at this point…well you certainly should be, because I guarantee these babies are some of the best brownies you will ever eat! 

IMG_6804

All week I was tossing up between choc chip cookies and these but every single person I asked voted team brownie and so it was inevitable that I bake em! And trust me I don’t regret it one tiny bit. If you’re a chocolate fanatic like me, and you’re trying to be healthy I suggest you do not make these as they will be gone in the time spam of a minute! But for those out there looking for the perfect treat join me in making (and devouring) these devils!

Start by preheating your oven to 180 degrees celcius and then line your baking tray..you know the drill ;). 

Then it’s straight onto the chocolate, butter and marshmallows. Just wack em in a pot over the stove and keep stirring until the marshmallows have melted.

IMG_6743IMG_6732IMG_6744

Once the marshmallows are incorporated into the chocolate and the butter, take the pot off the heat and transpose your mixture into a separate bowl to chill.

Whilst the chocolate mixture chills, start beating the sugar and eggs until the mixture is pale and creamy.

                             IMG_6746IMG_6749

Once the chocolate has cooled, stir in the sugar and egg mixture. Then sift in flours and cocoa.

IMG_6758

Finally, Add in the beautiful dried cherries, for that final punch of flavour. This will surely take the brownie to the next level!

IMG_6765 IMG_6768IMG_6761IMG_6769

Finally transfer the mixture to your previously lined baking tray and bang it down on the table to even out the spread. 

IMG_6775IMG_6771

Then pop it in the oven for 50-55 minutes and the results will exceed all gooey expectations!

IMG_6777

Once you’re brownies are baked don’t forget to cut them in nice, generous serves and finish them off with a little dust of icing sugar .

IMG_6787

So here’s what you’re going to need:IMG_6789

  • 200g unsalted butter, chopped.
  • 150g marshmellows.
  • 200g 70% cocoa chocolate chopped.
  • 4 Eggs.
  • 1.5 cups of caster sugar.
  • 3/4 cup of plain flour.
  • 1/3 cup of baking cocoa.
  • 80g of sweet dried cherries 😉

And there you go lovelies, heart warming brownies, with a cherry, marshmallow twist 

IMG_6807

IMG_6802

IMG_6793


Love, Susie 

0

Fan of the Month

Hi Bakers today is a special day because today we celebrate our fantabulous fan of the month. This is the first FOTM we’ve ever done and we’re so excited to be awarding thos prize to a star baker. Zara from Sydney has made us proud with her version of our Heart Melting moments ( https://susieandsandy.wordpress.com/2014/02/19/heart-melting-moments/ ). 

She sent us in this fab photo of her delights which she shared with her family on Mothers Day ❤

IMG_6570

Thanks so much Zara for you’re great baking! If anyone else wants to send in their creations don’t hold back just place a comment below or email to lana.hoffman5@gmail.com 🙂

IMG_6131Happy Baking!

Love S&S


0

Passion Pistachio Slice

IMG_6288On Friday night my family and I went down to Bowral in the freezing cold, it was truly beautiful and the air was so crisp however I think I nearly froze to death. On the rainy Saturday morning we got up and went into the town, had lunch at a cute country cafe and found a fantastic cookery shop. I instantly fell in love with the shelves and shelves of cook books and appliances and just couldn’t help myself but to buy nearly half the shop. So here I am with my new tart tins, flan tins, thermos’s and my brand new baking cook book (called Gran’s Sweet Pantry). As soon as we arrived home I was just desperate to try out a recipe and that is exactly what I did. My eyes instantly stopped at this slice recipe. I knew I just had to make it then and there. So here it is….

IMG_6240

 In a food processor blend the biscuits and pistachio (or if you don’t currently have one, like me :(, crush and mix by hand). Then in a bowl add condensed milk, melted butter and zest of one lemon to the biscuit and pistachio crumb.

IMG_6242IMG_6244

IMG_6246Once all the ingredients are well combined, place the mixture in aIMG_6248 slice tin or a shallow baking tray and press down firmly. Then place in the fridge whilst you crack onto the icing.

No slice would be complete without a sweet, sugary icing to top it off and it’s just too easy to make! 

Start by sifting the icing sugar into a medium bowl. Then add the butter, some passion fruit pulp (for a IMG_6252hit of acidity) and finally some milk until the consistency is nice and smooth.

Now to finish it off… Take the slice out of the fridge and spread the icing on top. Then all that’s left to do is chill it for another 2 hours in fridge and then cut into squares of rectangles. 
IMG_6258

Now your’e done! Woola..easy peasy passion-pistachio slice yumminess!!

Here’s what you need (12 pieces):

BASE-IMG_6281

  • 2 250g marie biscuits
  • 2/3 cup of pistachios
  • 1 395g sweetened condensed milk
  • 200g melted butter
  • Zest of 1 lemon

ICING

  • 2 cups of icing sugar
  • 50g softened butter
  • 3 tbsp passion fruit pulp
  • Milk


Eat up little bakers xxx

IMG_6283

Love Suzzzzz 😛

0

Very Vanilla Cupcakes

IMG_6297

This weekend I finally got to baking, I’ve been so busy lately but I couldn’t take it anymore I just had to whip out my whisk and wooden spoon. Forget homework, assignments and housework I just needed to bake!! So what better than these sweet, delicate and very vanilla cupcakes which I made for all my little cousins at a family get together on Sunday!

We start by preheating the oven to 180 degrees as well as lining 12 muffin tins with your cuttest cupcake holders. Then cream the butter and sugar.IMG_6265

Add the eggs one by one, mixing briefly in between.

Then in a separate bowl sift the flours and mix together.

Next mix the vanilla extract and the milk together.

Slowly pour even amounts of milk and flour into the egg mixture, adding small amounts bit by bit.

When your mixture is smooth and creamy you can turn off the mix master and start evenly portioning the batter into the muffin tin.IMG_6271IMG_6272


The cupcakes are now ready for the oven.       Place them in for 25 minutes and magic will happen. 

Whilst the cupcakes are doing their thing in the oven it’s time to start on the icing. 

Running with the vanilla theme I bought some vanilla pods to put in my icing. It adds great flavourand a lovely look for the final product. Simply, mix sieved sugar, softened butter, buttermilk, vanilla essence and pod. Stir until smooth and lucious.

IMG_6274

When the cupcakes are ready, test them with a skewer and them bring them out of the oven to rest ona drying rack. The cakes should look beautiful and golden. 

IMG_6277Let them cool for about 15 minutes and then it’s that time we’ve all beenwaiting for! THE ICING! Yayy 😛 

I chose to ice my cupcakes quite rustically as the littleys will devour the cakes no matter how they look and I won’t be depressed if my casually spread icing is demolished in a heart beat hAhA. 

I chose to glam my cupcakes abit by adding some drops of glitz. I just love those colourful little pearls you find in the baking section at coles and each time I walk past I just can’t help to take! So get creative and style with your fave decorations and toppings 🙂

IMG_6291Ingredients (makes 12): 

For the cakes:

  • 110g butter
  • 225g caster sugar
  • 2 eggs
  • 125g plain flour
  • 150g s-r flour
  • 120ml milk
  • 1 tsp vanilla extract

For the icing

  • 50 g butter
  • 125g icing sugarIMG_6290
  • 1 tbsp buttermilk
  • 1 tsp vanilla extract
  • Seeds from 1 vanilla pod


And that’s that! Perfect for kids, perfect for the cold, perfect for a party, just perfect! So if your’e sweet tooth is yearning for a treat I highly suggest you relieve your craving and munch on these nommies!


IMG_6295

Loveeee, Suzz xxx