0

Chewy Coconut Meringue with Homemade Lemon Curd

IMG_8051

I’d like to begin by apologising for not posting for so long! I have been busy getting ready for some exciting surprises which I will let you in about soon. Hopefully I can make it up to you with these little delights. What are they you ask? They’re sweet, chewy, crunchy, tangy and soft- they are my coconut meringue bites with a lemon curd surprise! So so simple to bake and such a cute little treat to tickle your taste buds.

Begin by lining two baking trays and preheating the oven to 120 degrees. It’s really important to measure out your ingredients precisely for the perfect result. Once your confident to begin start whisking up the egg whites in a large bowl. At this stage you can add a pinch of salt or cream of tartar to stabilise the egg before the sugar goes in.

Once your mixture has reached soft peaks, add the sugar gradually between whisks. When all the sugar has been added continue to whisk for a further 2-3 minutes or until the mix is thick and glossy. Also make sure all the sugar is dissolved. I use the age old trick of rubbing a touch of meringue between my thumb and my index forefinger. IMG_7996

IMG_7999When you’re happy with the constancy carefully fold in the shredded coconut for lovely flavour and the pink food colouring for aesthetics.  

 Now you can pipe or spoon out the meringues onto you’re prepared baking trays. On one baking tray pipe large circles and on the other do little swirls which will be the hats on the lemon curd treat. Pop them in the oven, turning the heat down to 90 degrees celsius for 1.5 hours then turn the heat off and let them sit for a further 2 hours… I know it seems long but it’s worth it for the best meringues you’ll eat. When they come out of the oven they should be crisp and sound hollow when tapped on the base. They will be light, crisp and chewy on the inside mmmmm

IMG_8029

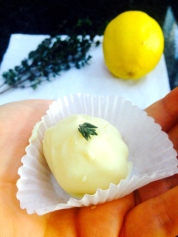
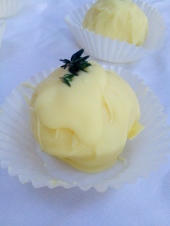
Now to get creative… simply pull out you’re homemade lemon curd (or store bought if you must) and put a teaspoon of lemon curd on top of the larger (base) meringue and top it off with you’re little swirly meringue hats. So cute, so impressive and so worth it!

Ingredients (makes 12 large):

  • 4 Egg Whites (ROOM TEMPERATURE!)
  • Pinch of salt or cream of tartar
  • 1 cup of caster sugar
  • Dessicated coconut
  • 12 tsp lemon curd

IMG_8046

There you go. Delish (licks lips)! 

Hope you loved today’s recipe 

Love, Suz ❤ 

1

Heavenly White choc, Thyme and lemon Truffles

IMG_7698It feels like forever since I’ve last blogged about a bake and Sandy and I apologise for taking so long, we’ve been very busy lately!  However, if there is one recipe to redeem ourselves I can confidently say this is the one 🙂 These beautiful balls of white chocolate heaven, married together with lemon and thyme, are surely melt in your mouth magical. They are rich, creamy and the perfect little treat to end off a long day. So enjoy the recipe- it’s easier than it seems and there’s absolutely no oven involved.

IMG_7684

IMG_7604Let’s begin! In a small saucepan heat up the heavy cream, lemon zest and thyme sprigs with aIMG_7612 medium flame, until the combination comes to a simmer. Then remove from the heat and place on a lid allowing the mixture to come to room temperature which should take around 20 minutes.

Whilst you wait, you can begin to chop up the white chocolate and combine that with the butter and salt in a medium heatproof bowl.

IMG_7617Once the cream has cooled place it back on the stove, on medium heat, until, again, it reaches a simmer. Then remove the mixture and strain the cream, into the white choc, with a fine-meshed strainer, pressing down on the thyme sprigs and lemon zest to extract as much flavour as possible.

Now set the chocolate mixture over a pot of almost simmering water and constantly stir until just over half of the chocolate has melted. Then remove from the double boiler and continue stirring until the whole mixture has melted smoothly. Then just stir in the lemon juice until it’s well incorporated.

Place the mixture in the fridge for a good 4 hours and then it’s time to wait. 

Whilst I was waiting Sandy and one of our friends came over and we walked to a really cool gelato store named Stix. We were quite crazy because it was freezing cold but it didn’t take away from the incredible taste and atmosphere. 

IMG_7636IMG_7643

It was such a cool place, we got to pick a flavour and then decorate our ice-creams with elaborate toppings 🙂 So obviously we went crazy!

IMG_7641

Then we headed back to mine in time to pull out the truffle mix at the right consistency to start rolling into balls. To give the truffles a great finish melt some white chocolate and dip the balls in it. Lastly place a few leaves of the thyme on top of the truffle and there you have it. Perfection in the form of a little white sweet. 

IMG_7689

Okay so here’s what you need to make a batch of 20 or 25 smaller truffles:

  • 90ml heavy cream.
  • 200g white chocolate (for the truffle mixture)
  • 200g white chocolate (for the glaze)
  • Around 10 thyme sprigs.
  • A pinch of salt.
  • 40g butter.
  • Zest of 2 large lemons.
  • 2 tbsps of lemon juice.

And that’s that. These are amazing treats that you can store in your fridge for up to a week and freeze for months! So I hope you liked todays recipe and please go ahead and give it try- you won’t regret it!

IMG_7700

IMG_7667

IMG_7671


Love, Susie and Sandy xOxO

0

Fantastical Finger Lime Tartlets

IMG_5440


Just the other day Dad came home from work carrying a mysterious white plastic bag which he later revealed was filled with these funny little ovular shaped objects. They smelt incredible and looked inviting with their bright red and green coats but I had no idea what they were. Then Dad told me that his patient had given him these beautiful Finger Limes, grown fresh from his own garden. I was so excited because these finger limes were so intriguing and immediately I began searching for a recipe that would make the fruit shine. Then I stumbled upon a finger lime custard that I knew was just perfect for some gorgeous little finger lime tarts.

IMG_5315

So on Saturday I bought the ingredients and then Sandy and our friend Sam came over, we went out for Mexican and then did a late night bake!

IMG_5406IMG_5392
So we begin with a bag of Marie biscuits and some butter. Crush the bikkies with a baking pin until you’re left with crumbs, then add the melted butter. Put the biscuit in the base of some cupcake moulds, pressing them down firmly, and then place in the fridge to harden up.

IMG_5318

Now onto the Limes. Wash in hot water about six of them and then cut them in Half. Squeeze out as much juice as possible and grate the lime zest, then set aside. 

Now that’s done, it’s custard time 🙂 Separate the eggs and beat the egg yolks, sugar, cornflour, grated lime rind and 100 ml milk until the mixture is nice and creamy.

IMG_5361 

Bring the rest of the milk to boil, then remove from heat and carefully stir the egg yolk mixture into the milk. Return to boil, stirring continuously and cook over a low heat until the mixture thickens.

IMG_5368

Add the Finger Lime juice and fruit ‘bubbles’ and finish off the cooking for a further 30 seconds. Then leave the custard to cool, stirring every so often. Whisk the egg whites very stiffly, add a pinch of sald and then fold into the lime creme.

Last step is to bring out your biscuit bases and fill the rest of the moulds with the custard and finally chill for at least two hours. 

There you go, surprisingly delightful little lime tarts. And you can decorate them however you like!

Ingredients (makes 12):

  • 150g Marie biscuitsIMG_5439
  • 80g butter
  • 6 finger limes
  • 3 eggs
  • 100g sugar
  • 50g cornflour
  • 400ml milk
  • 400g pure cream
  • 5 tbsp icing sugar
  • 1 pinch salt

Eat and Bake happy!!

Love Suz 😉 x